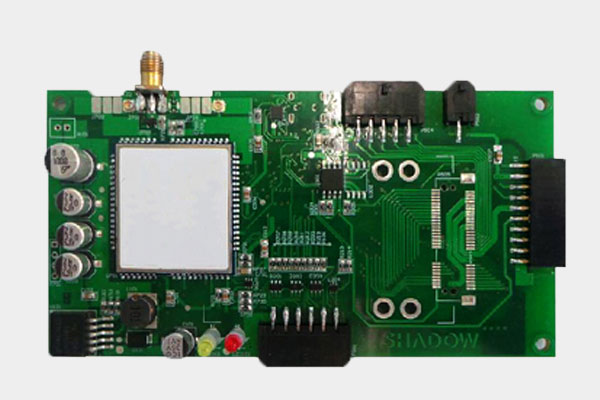
Basic design flow of the general PCB
The basic design procedure of the general PCB circuit board design is as follows: pre-preparation -> PCB structure design -> PCB layout -> wiring -> wiring optimization and silk screen -> network and DRC inspection and structural inspection -> plate making.

First: preliminary preparation
1. This includes preparing the component library and schematic. "If you want to do something good, you must first sharpen your tools." To make a good board, in addition to designing the principles, you must draw well. Before proceeding with PCB design, you must first prepare the component library of the schematic SCH and the component library of the PCB (this is the first step - very important). The component library can use Protel's own library, but it is generally difficult to find a suitable one. It is better to do the component library yourself according to the standard size of the selected device.
In principle, first do the component library of the PCB, and then do the component library of the SCH. PCB component library requirements are higher, it directly affects the board installation; SCH component library requirements are relatively loose, as long as you pay attention to define the pin properties and the corresponding relationship with the PCB components.
PS: Pay attention to the hidden pins in the standard library. Then there is the design of the schematic, and when it is ready, it is ready to start PCB design.
2. When making the library of the schematic diagram, pay attention to whether the pin is connected to the output PCB and check the library.
Second: PCB structure design
This step draws the PCB surface in the PCB design environment according to the determined board planar dimensions and various mechanical positioning, and places the required connectors, buttons/switches, digital tubes, indicators, inputs, and outputs according to the positioning requirements. , screw holes, mounting holes, etc. and fully consider and determine the wiring area and non-wiring area (such as the extent of the screw hole is a non-wiring area).
Third: PCB layout
1. Make sure the schematic is correct before layout - this is very important! -----Very important!
2. The layout should be paied attention to the surface placed by the device (especially the plug-in, etc.) and the way the device is placed (straight plug is placed horizontally or vertically) to ensure the feasibility and convenience of the pcb components installation.
3.The layout is white and put the device on the board. At this time, if the preparations mentioned above are all done, you can generate a network table (Design->CreateNetlist) on the schematic, and then import the network table (Design->LoadNets) on the PCB. I saw the full stack of devices, and there are flying line prompt connections between the pins, and then the device layout can be made.
The general layout is based on the following principles:
When laying out, you should determine the surface on which the device is placed: in general, the components should be placed on the same side, and the plug-in should look at the specific situation.
Fourth: laying wire
Laying wire is the most important process in the overall PCB design. This will directly affect the performance of the PCB.
The wiring is mainly carried out according to the following principles:
1.Under normal circumstances, the power line and ground line should be routed first to ensure the electrical performance of the board. Within the scope of the conditions, try to widen the power supply and ground line width.
2. Pre-wire the more demanding lines (such as high-frequency lines), and the edges of the input and output ends should avoid adjacent parallel to avoid reflection interference. If necessary, add grounding, and the wiring of two adjacent layers should be mutually Vertical, parallel is prone to parasitic coupling;
3. The oscillator case is grounded, and the clock line should be as short as possible and cannot be cited everywhere.
4. Use 45° fold line wiring as much as possible, and do not use 90° fold line to reduce the radiation of high frequency signals; (require high lines to use double arc lines);
5 Do not form a loop on any signal line. If it is unavoidable, the loop should be as small as possible; the number of vias of the signal line should be as small as possible;
6 The key lines are as short and thick as possible, and the protection is added on both sides;
7. When transmitting the sensitive signal and the noise field band signal through the flat cable, it should be extracted by means of “ground line-signal-ground line”;
8.Key signals should be reserved for test points to facilitate debugging, production and maintenance testing;
9. After the schematic wiring is completed, the wiring should be optimized.
Fifth: add teardrops
Sixth: Check the first item, and then look at the Keepout layer, the top layer, the bottom layer topoverlay, and the bottomoverlay.
Seventh: electrical rules check: vias (0 vias - very incredible; 0.8 boundary line), whether there is a disconnected netlist, minimum spacing (10mil), short circuit (one parameter to analyze one by one)
Eighth: power line and ground line inspection - interference.
Ninth: Reload the webmark after the PCB is completed to check if the netlist has been modified - it works.
Tenth: After the completion of the PCB, check the line of the core device to ensure accuracy. Building 1, Senyang Electronic Technology Park, Guangming High-tech Park, Yutang Street, Guangming District, Shenzhen City.
 F:86-13418481618
 pcba13@fastpcba.cn
 date:2018-11-27 16:41:00

 Building 1, Senyang Electronic Technology Park, Guangming High-tech Park, Yutang Street, Guangming District, Shenzhen City.
 F:86-13418481618
 pcba13@fastpcba.cn